
So you've scheduled a bunch of posts on LinkedIn, and now... where did they go? It's a common question, and thankfully, finding them is a lot easier than you might think once you know the secret handshake.
Just click to "Start a post" like you normally would. At the bottom of that pop-up window, you'll spot a tiny clock icon. Give that a click, and then hit "View all scheduled posts." Boom—there’s your entire content queue, ready for review. This little trick works the same whether you're managing your personal profile or a company page from your desktop.
Why Finding Your Scheduled Posts Actually Matters
Look, knowing where to find your content queue isn't just about navigating the platform. It's a critical piece of any solid LinkedIn strategy. When you take the time to schedule content in batches, you’re building a consistent rhythm that keeps your audience hooked and your professional brand alive and kicking.
Consistency is everything on LinkedIn. In fact, pages that post weekly see 5.6x more follower growth than those that post whenever they remember to. LinkedIn lets you schedule content anywhere from one hour to three months out, giving you a ton of control over your content calendar.
Mastering this simple function gives you a few key advantages:
- Strategic Consistency: You can maintain a steady drumbeat of content, which is how you build momentum and stay on your network's radar.
- Time Efficiency: Scheduling frees up your daily mental bandwidth. Instead of scrambling to post, you can focus on what really matters—engaging with comments, networking, and building relationships.
- Quality Control: A quick scan of your queue lets you catch embarrassing typos, update last-minute info, or shift a post's timing to be more relevant to current events. It ensures every post lands perfectly.
- Performance Tweaks: Having a clear pipeline helps you see what's planned. This is the perfect time to double-check if your posts are aligned with our guide on the best time to post on LinkedIn for maximum reach.
Ultimately, managing your scheduled content is about being proactive, not reactive. It turns your LinkedIn activity from a bunch of random updates into a deliberate, goal-driven communication channel.
Once you've got your schedule locked in, the next step is to get more mileage from your work. A great way to do this is by repurposing content for maximum impact, ensuring every piece you create works harder for you.
Finding Scheduled Posts on a Desktop
Let's be honest, managing your content pipeline is almost always easier on a desktop. The bigger screen just gives you a better command center view. Finding your scheduled LinkedIn posts is simple once you know where to look, but LinkedIn has it tucked away in a spot that isn't immediately obvious.
You don't have to go digging through endless settings menus. It’s all right there in the post composer.
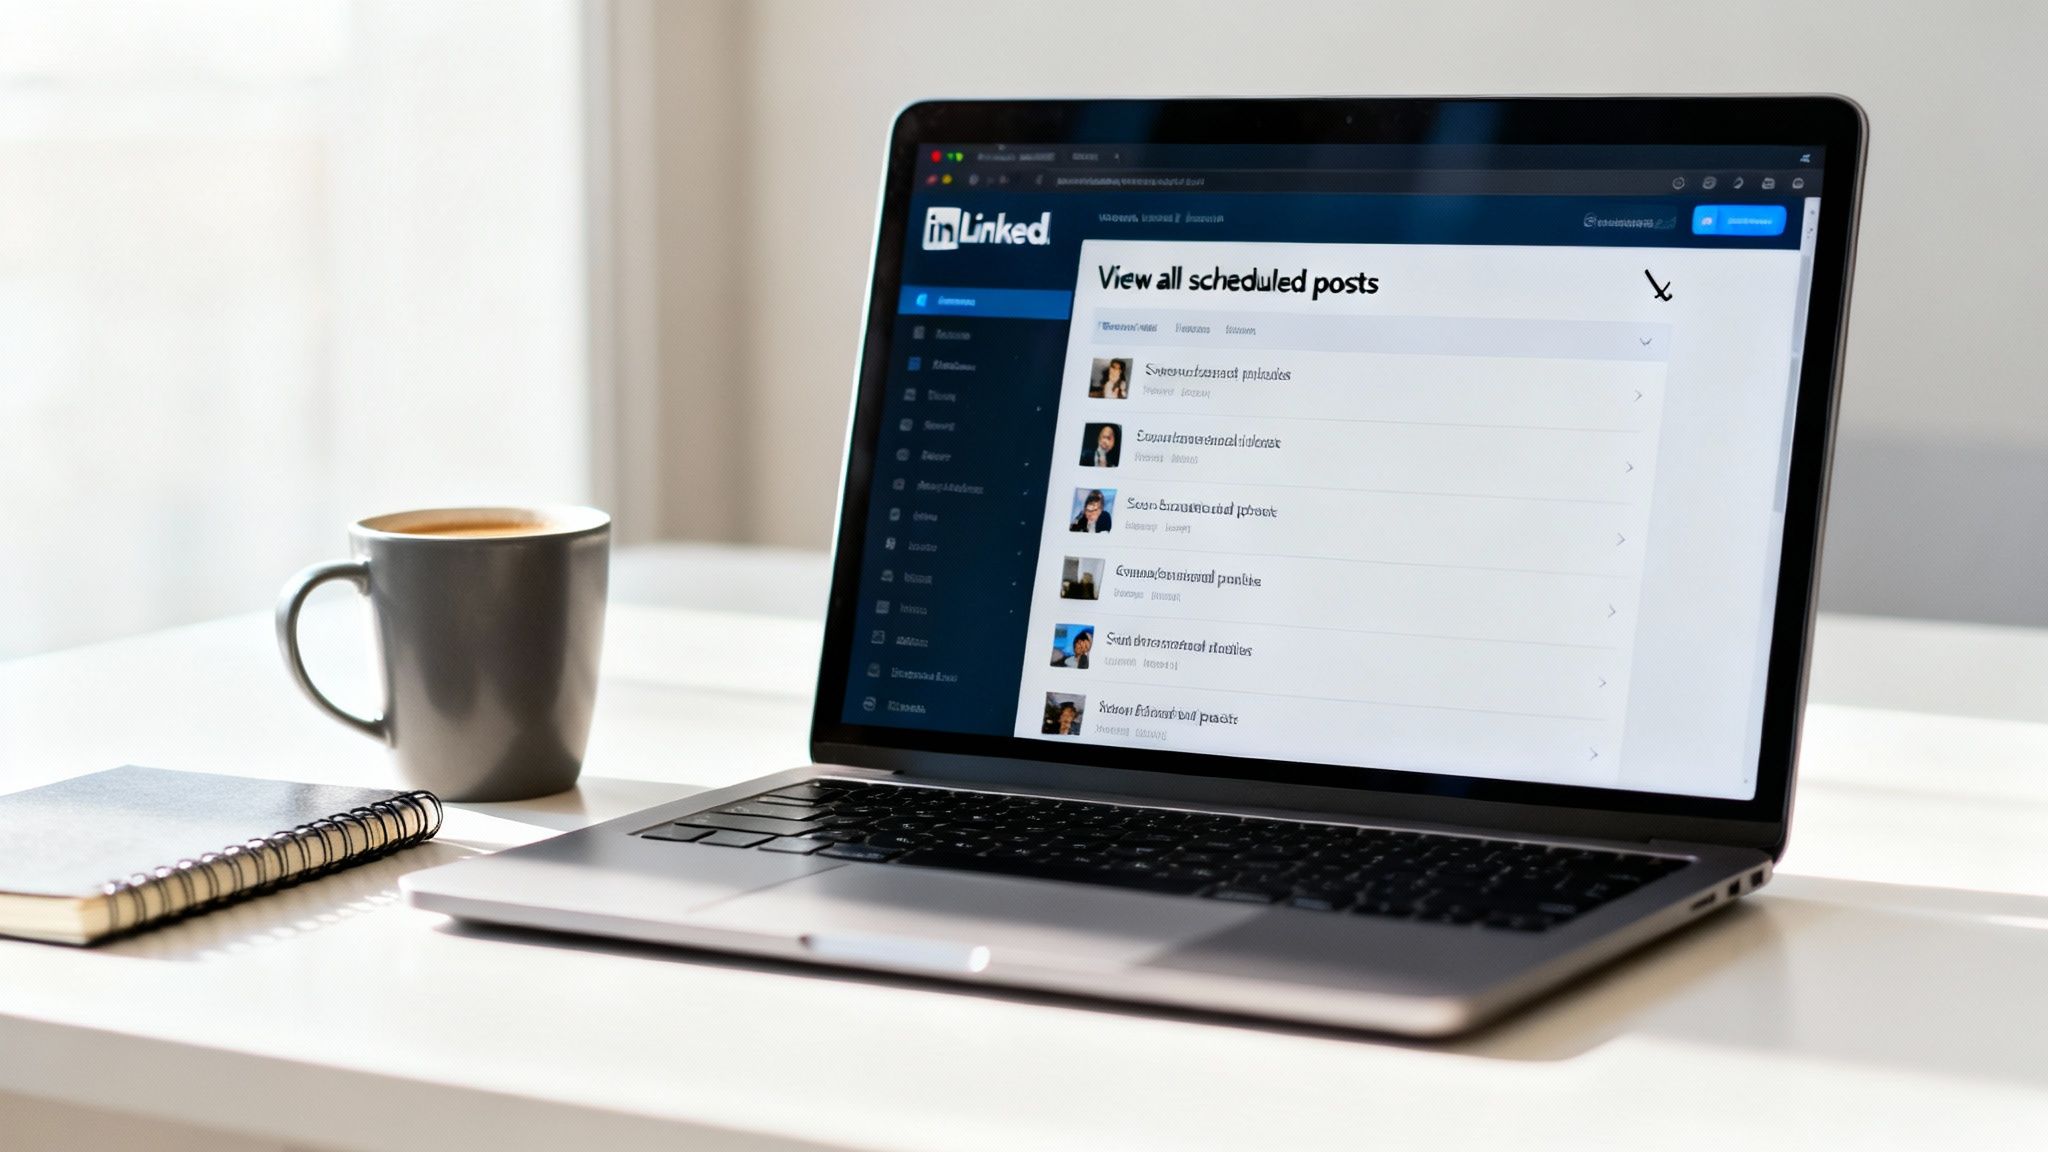
First, head to your LinkedIn homepage and click the "Start a post" button, just like you’re about to share a new update. This brings up the familiar composer window. Now, ignore the text box and look down at the bottom—you’ll see a little clock icon. That’s your target.
Clicking that clock icon gives you a couple of options. You could schedule the new post you're not writing, or, more importantly, you can get a look at everything you've already queued up. Just hit "View all scheduled posts" and you're in.
Navigating Your Content Calendar
Once you click through, LinkedIn lays out all your upcoming posts in a clean, chronological list. This is the perfect spot to give everything a final once-over. You can quickly check your publishing dates, proofread the copy one last time, and make sure your posting schedule still makes sense with your overall strategy.
Managing this for a Company Page? The process is exactly the same—you just start by clicking "Start a post" from your company's feed instead of your personal one.
Here’s a look at that all-important clock icon inside the post composer. It's the key to the whole thing.
Remembering where that little icon lives is pretty much the only trick you need to know for how to find scheduled posts on linkedin using your desktop.
Think of this view as your content command center. It’s not just a list; it’s a tool for quality control, allowing you to catch typos, update information, or adjust timing before a post goes live.
Getting comfortable with this little workflow is a game-changer. It takes scheduling from a "set it and forget it" task and turns it into an active part of your content management. Popping into this queue regularly gives you total control over what you're saying and when, ensuring every single post that goes out is polished and on-point. This simple habit can save you from a lot of last-minute stress and keeps your content strategy running smoothly.
Finding Scheduled Posts on the Mobile App
For anyone juggling a content calendar, managing things from your phone isn't a "nice-to-have"—it's an absolute must. Finding your scheduled posts on the LinkedIn mobile app is just as simple as on desktop, even though the icons have a habit of moving around a bit depending on your device.
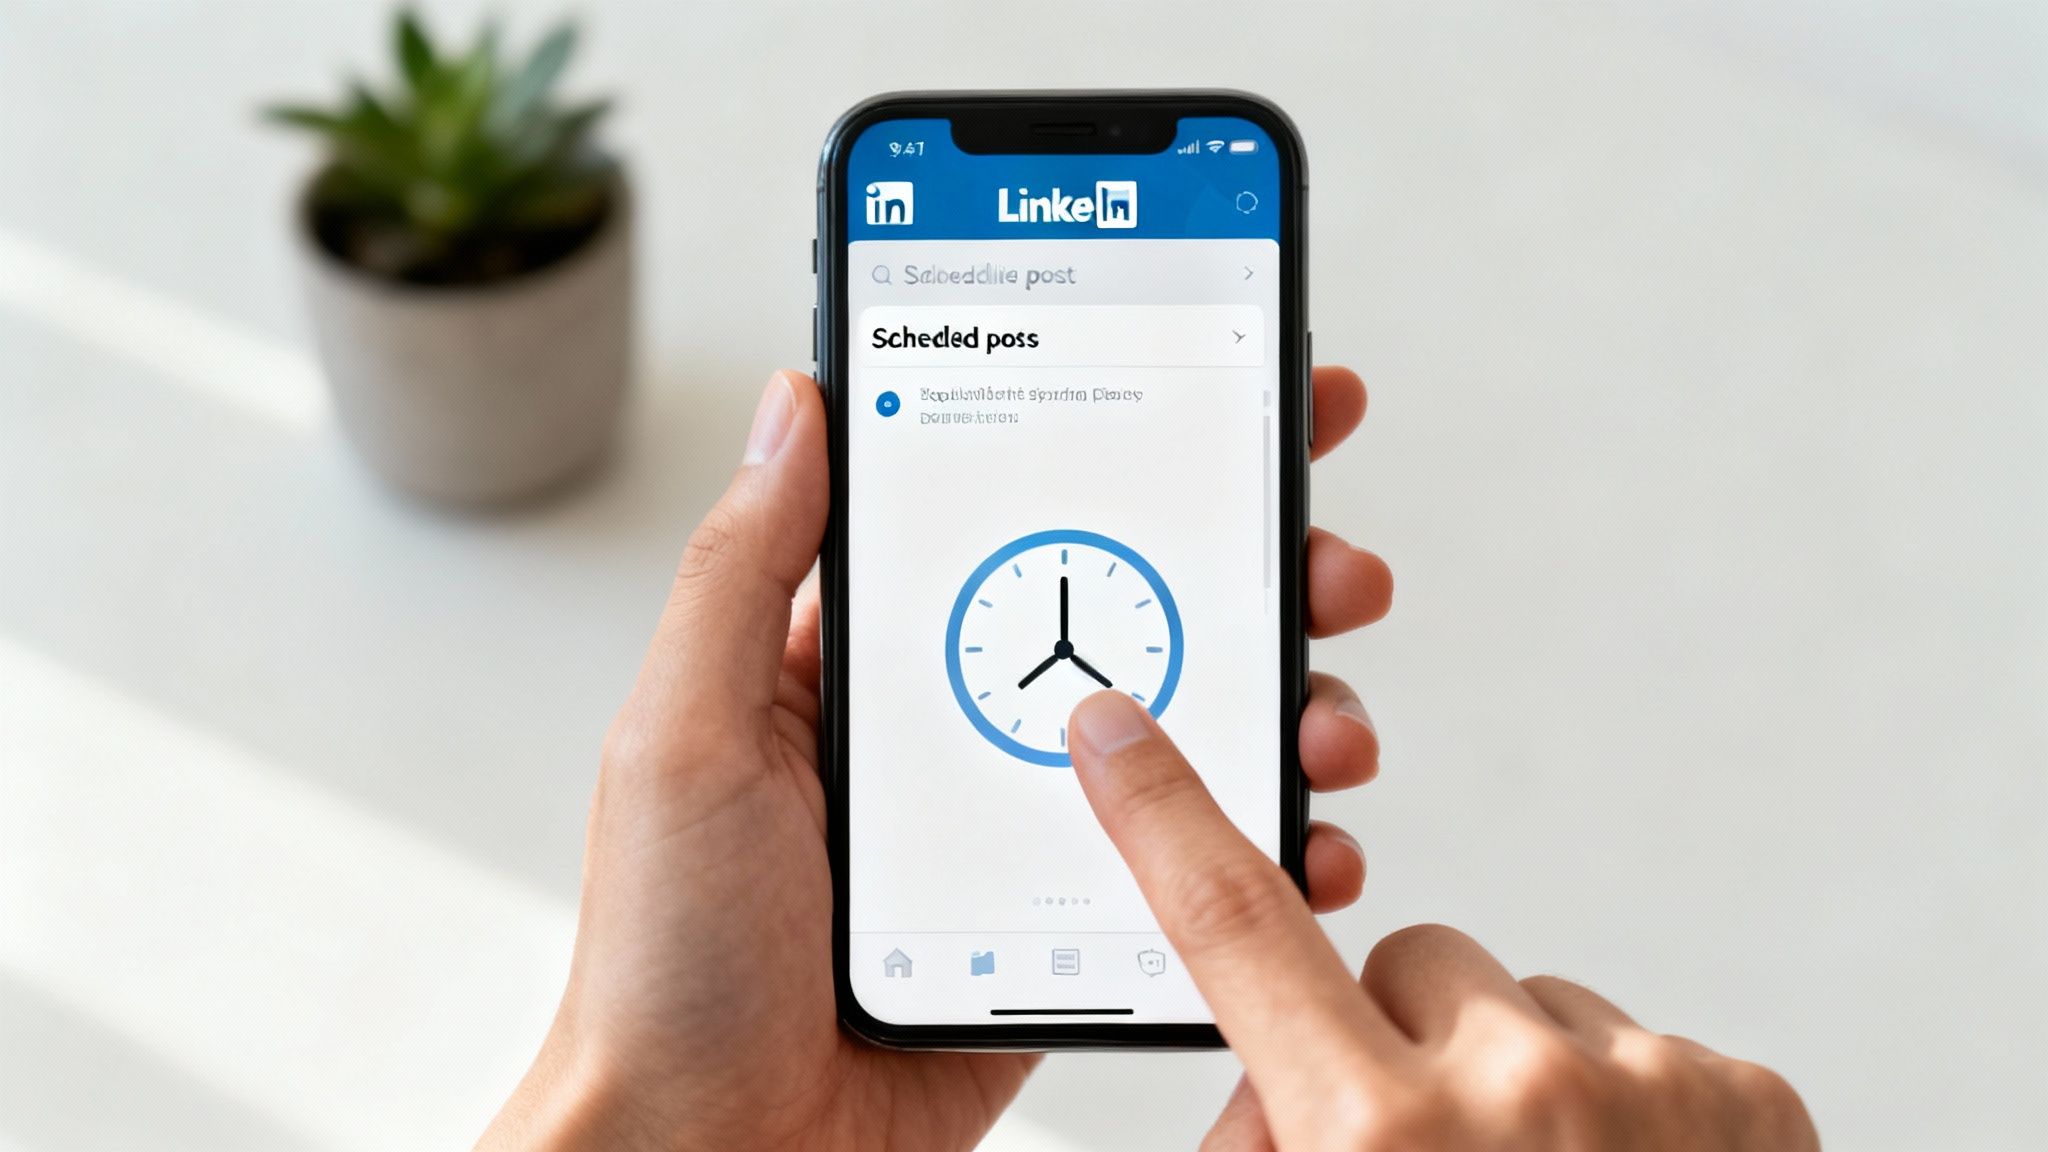
First, pop open the app and tap the “Post” button you see at the bottom. This brings up the standard post composer. Don't start typing—instead, look for a small clock icon. You'll usually find it near the "Post" button or somewhere along the top of the composer window. Tapping that little clock is your direct ticket to seeing everything you've got lined up.
Quick Checks From Anywhere
Once you tap the clock, the app pulls up a clean list of all your queued-up content, neatly ordered by its go-live date. I find this mobile view is perfect for those quick sanity checks when I'm away from my computer.
It's incredibly useful for a few specific things:
- Confirming Post Times: A quick glance is all it takes to verify your posts are dropping at the right time for your audience.
- On-the-Go Proofreading: Ever notice a typo right after hitting publish? This is your chance to catch those last-minute errors before the post goes live.
- Checking for Relevancy: Sometimes news breaks and a post you scheduled last week suddenly feels out of touch. A quick review lets you make sure everything still lands right.
I can't tell you how many times I've saved myself from a simple mistake by scanning my queue during my commute or while waiting for a meeting. That mobile access is what keeps a content strategy agile.
One thing to keep in mind: while the mobile view is fantastic for quick reviews, the editing options are a bit limited. If you spot a major issue, you'll likely have to delete and reschedule the post. It’s a small trade-off for the convenience of having your entire content pipeline in your pocket.
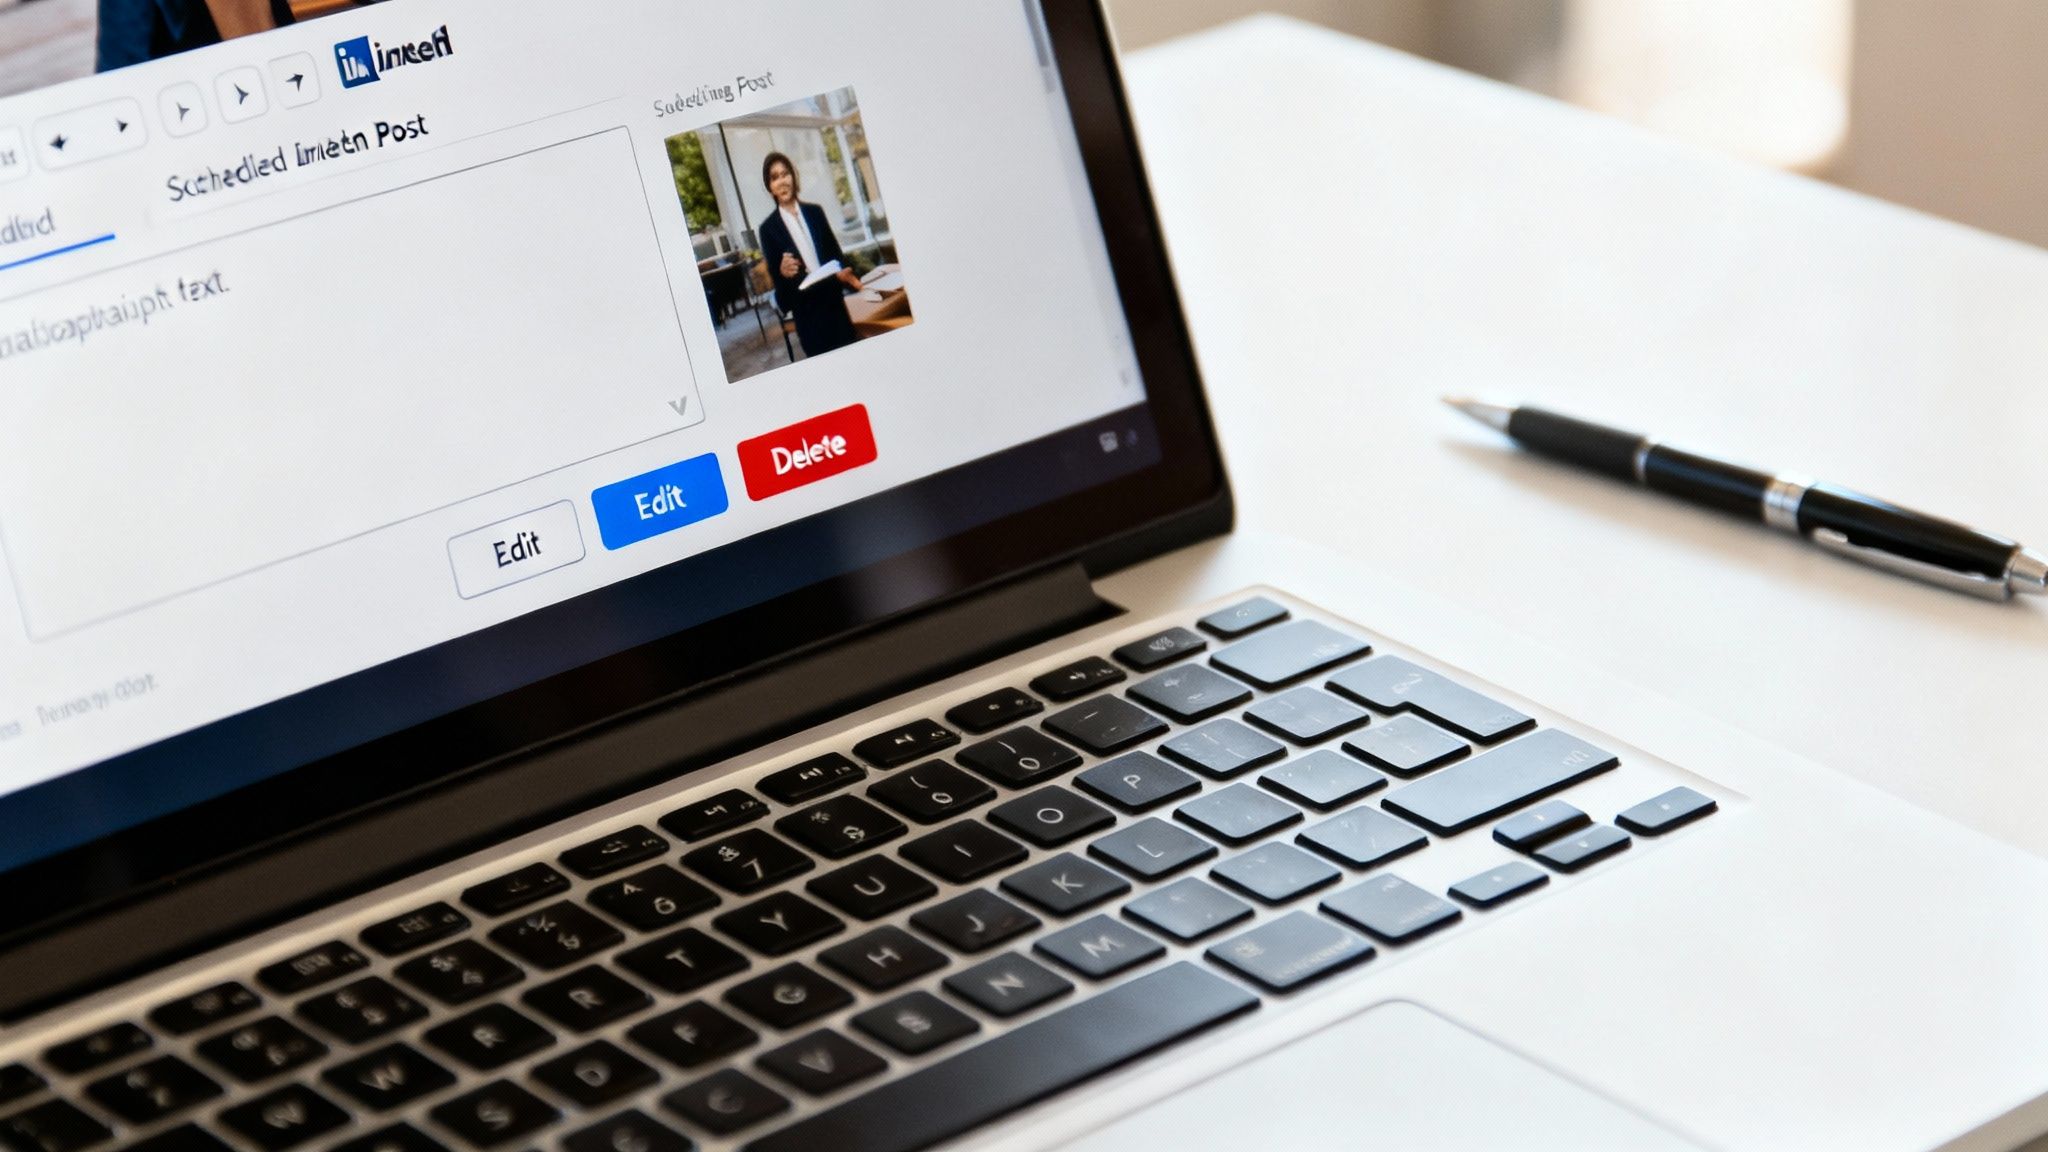
How to Edit or Delete Scheduled Posts
Okay, so you've found your scheduled posts. That's step one. But a truly killer content strategy isn't set in stone—it needs to be flexible. Things change. A link breaks, a stat gets updated, or you have a sudden flash of inspiration that a post would hit way harder on a different day.
Luckily, once you're looking at your queue of scheduled content, making tweaks is dead simple. Each post will give you options to either edit or delete it outright. This is your command center for keeping your content sharp and relevant.
Picture this: you've scheduled a post hyping a big webinar, but the marketing team just changed the registration link. No sweat. Instead of panicking and deleting everything, you can just hop into the post, hit "Edit," and swap in the new link. Crisis averted.
Rescheduling for Maximum Impact
Sometimes the content is golden, but the timing is just... off. This is where the reschedule button becomes your best friend. Maybe you queued up a brilliant post for Friday afternoon, then remembered that your audience is basically checked out for the weekend.
Data consistently shows that the prime time to post is Tuesday through Thursday between 8 a.m. and 2 p.m., with engagement often spiking mid-morning. If you want to dive deeper, Sprout Social has some great insights on optimal LinkedIn posting times.
With that knowledge, you can simply open the scheduled post, click to change the date and time, and save it. That tiny adjustment can be the difference between a post that gets a handful of likes and one that truly takes off.
When to Just Delete a Scheduled Post
Let's be real: not every post you draft is destined to see the light of day. And that's perfectly fine. Deleting a post is the clean, simple choice when the content is no longer relevant or if you just want to scrap it and start over.
A few real-world scenarios where deleting makes the most sense:
- A Canceled Event: The post promotes a conference or webinar that's been called off.
- Outdated Information: A major news story breaks that makes your post's topic feel dated or insensitive.
- Strategy Shift: You've decided to pivot your content strategy in a completely new direction.
To give you a quick cheat sheet, here’s a breakdown of what you can do and when to do it.
Managing Scheduled Posts: Actions and Outcomes
| Action | Description | Best Use Case |
|---|---|---|
| Edit | Change the post's text, image, or links without altering the scheduled time. | Correcting typos, updating a URL, or refining the copy for better clarity. |
| Reschedule | Modify the scheduled date and time the post will go live. | Moving a post to align with peak engagement hours or a new content calendar schedule. |
| Delete | Permanently remove the post from your scheduled queue. It will not be published. | The content is completely irrelevant, an event was canceled, or you're overhauling your strategy. |
Think of these options as your toolkit for maintaining a dynamic and effective content calendar.
Getting comfortable with editing, rescheduling, and deleting gives you total control. It allows you to be agile and ensures every single post that goes out under your name is polished, timely, and positioned for success. And if you need a refresher on crafting killer content from the start, check out our guide on how to write engaging LinkedIn posts.
Troubleshooting Common Scheduling Issues
Even easy-to-use tools can surprise you when you least expect it. If you’ve clicked into your queue of LinkedIn drafts only to find nothing there, you’re in good company. Suspense over a missing “View All Scheduled Posts” link or a post that never leaves your drafts can throw off your entire week.
Often, the culprit is something as simple as an old browser cache. Before diving into more involved fixes, try clearing your browser's cache and cookies. Nine times out of ten, this clears out stale data and gets your scheduler behaving again.

Time-sensitive posts that miss their slot are another headache. When that happens, it’s easy to blame the tool. In reality, LinkedIn’s algorithm treats the first hour after posting like prime real estate. A hiccup on the server side can cost you critical early engagement. If you want to dig deeper, check out Hootsuite’s breakdown: LinkedIn's Algorithm Favors Early Engagement.
Understanding Platform Limitations
Not every glitch is a bug—sometimes it’s just how the platform is designed. For example, you can’t @mention colleagues or tag pages in a draft. If those tags are non-negotiable, you’ll need to hit publish and add them in real time.
Here are a few quick fixes:
- Disappearing Link: The “View All Scheduled Posts” option vanishes? Log out, then log back in. This simple refresh often brings it right back.
- Editing Errors: Struggling to save changes on a multi-image or video post? Delete the original draft and start fresh with a new schedule.
It’s a common misconception that using schedulers hurts your post’s reach. While glitches happen, the real factor in performance is content quality and engagement, not the tool you use to publish it.
If you’re still wondering whether scheduling posts impacts reach, it’s worth reading up on whether scheduling posts impacts reach. Knowing these quirks helps you troubleshoot fast and keep your content strategy humming.
Frequently Asked Questions
Even when you get the hang of scheduling content, a few tricky questions always seem to pop up. I’ve seen these trip people up time and time again, so let's get you some quick answers.
Can I See Posts Scheduled with Tools like PostFlow on LinkedIn?
Short answer: nope.
LinkedIn’s native scheduling tool only shows you what you’ve scheduled directly on LinkedIn. If you’re using a third-party tool like Hootsuite, Buffer, or PostFlow, your queue of scheduled posts lives exclusively inside that tool's dashboard.
Think of them as two separate systems that don't talk to each other. It's a crucial distinction to remember when you're trying to figure out where a specific post is hiding.
Is There a Limit to How Many Posts I Can Schedule?
LinkedIn is pretty generous here, but there is one key limitation to know about. While they don't seem to cap the number of posts you can line up, you can only schedule content up to three months in advance.
For most of us, a 90-day window is more than enough to map out a solid content plan. Honestly, it's probably for the best.
This time limit actually encourages a more agile content strategy. It stops you from scheduling something so far out that it becomes stale or irrelevant by the time it goes live. It’s a built-in way to keep your content fresh.
Why Can't I Tag People in a Natively Scheduled Post?
Ah, the million-dollar question. This is one of the most frustrating and well-known quirks of LinkedIn's native scheduler. For whatever reason, you simply cannot mention (@tag) other people or Company Pages in a post you schedule directly on the platform. The feature just isn't there yet.
So, what do you do if tagging is a must-have for a post? You’ve got a couple of options:
- Publish it immediately. If you need to tag someone, the easiest way is to skip the scheduler and just post it live.
- Use a third-party tool. Many social media management platforms have found a way around this limitation and allow you to schedule posts with tags included.
Knowing these little details can save you a lot of last-minute headaches and help you build a much smoother content workflow.
Ready to stop wrestling with LinkedIn's limitations and turn your expertise into consistent, engaging content? PostFlow gives you an AI content strategist, a powerful editor, and the fastest scheduler on the market, all in one place. Start growing your presence with PostFlow today.